Texturing Tools
There are several easy to use design tools available to texturize the 3D map. Use the Auto-Textures to get a good starting point for detailed textures.

Auto-Texturing Tool
With the new Auto-Texturing tool there are 8 different one-click texture sets available, that create the map surface automatically. You can take it as it is or use it as a good starting point for your own texture drawing.

Surface Gradient Presets
With the help of the 16 gradient presets it’s easy to generate illustrative map surfaces in no time. They can be used as default or as a basis for texturising. From abundant vegetation, desolate ice landscape, barren desert or lava landscape these gradient presets are able to picture everything. Of course all presets are fully editable. As a special, there is a height color preset with color scale, ready to be generated at the push of a button.

Seamless Textures and Brushes
Every map has its own surface texture requirements. With the 22 high quality textures and the 7 different brushes, almost every surface can be built in a fast and professional way. Simply click on the desired texture and start texturing. Every seamless texture has its own presetting of brushes, that can, of course, be edited to fit your personal requirements.

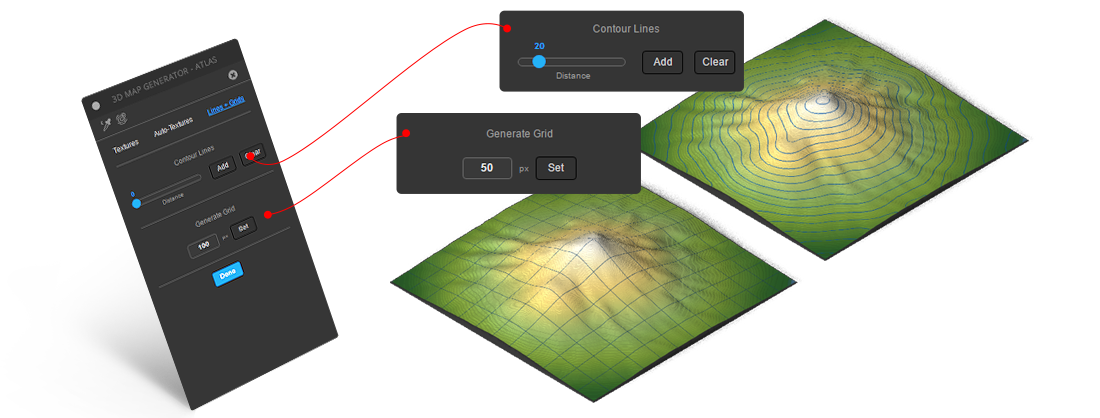
Contour Lines and Grid Tool
Create contour lines oder map grids of your desired spacing and color with just one click.
Contour lines definition Wiki: A contour map is a map illustrated with contour lines, for example a topographic map, which thus shows valleys and hills, and the steepness or gentleness of slopes. The contour interval of a contour map is the difference in elevation between successive contour lines.

Map Edge Color Picker
Just pick the color you want and the app will colorize the edges of the 3d terrain.
You can change it as often as you want.

Guides Tool
The Guides Tool creates guides out of the height map inside the texture file and helps to texturize more precisely.
It makes it easier to see the position of your shape (if you use one) and how the surface is structured.


